Horizontal Heavens
Observatory
"...From A Galaxy Far, Far
Away"
Clear Sky Chart

This page was last updated on 10/08/14.
Horizontal Heavens
Observatory
"...From A Galaxy Far, Far
Away"
|
|
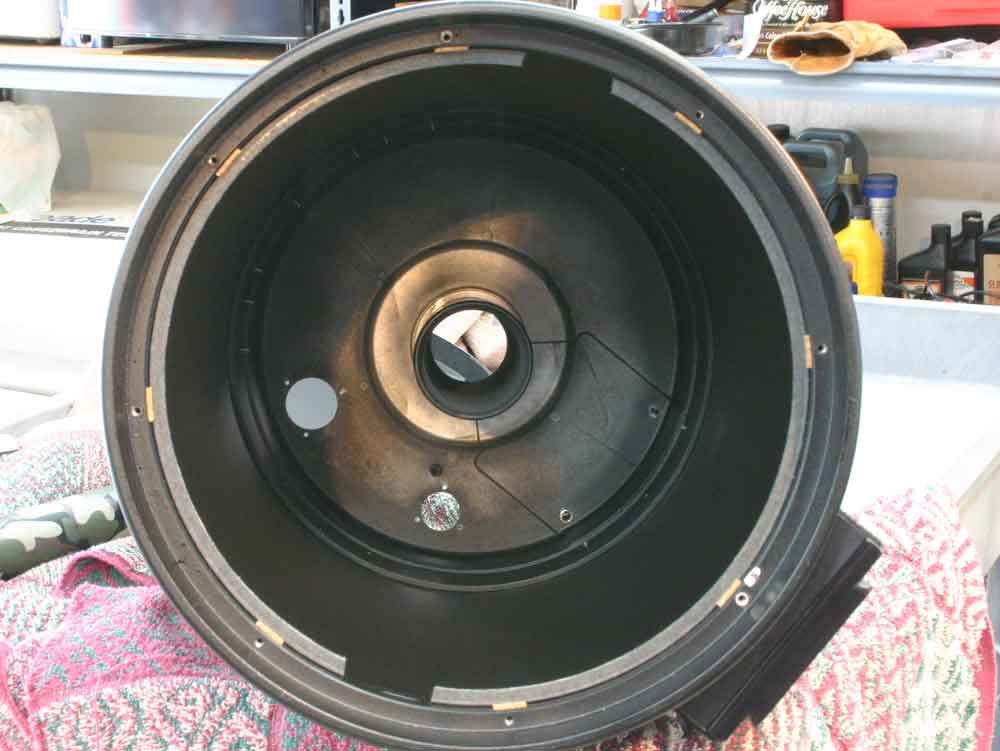
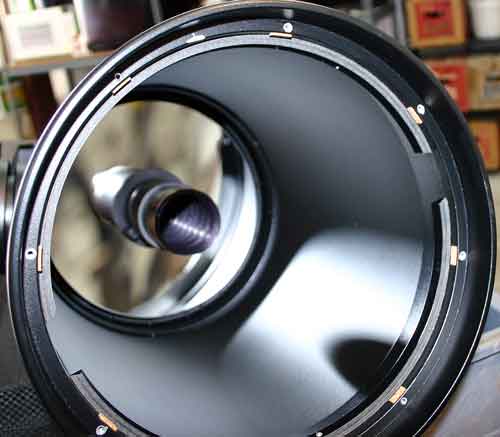
For the FLOCK of it! 10" LX200R and LX200 EMC - click to enlarge Well, I finally got around to flocking my 10" LX200R" after practice flocking with my 10" "Classic" last year. As we all know, Meade QC is at best known to be spotty and inconsistent. My LX200R proved to be no different, arriving with:
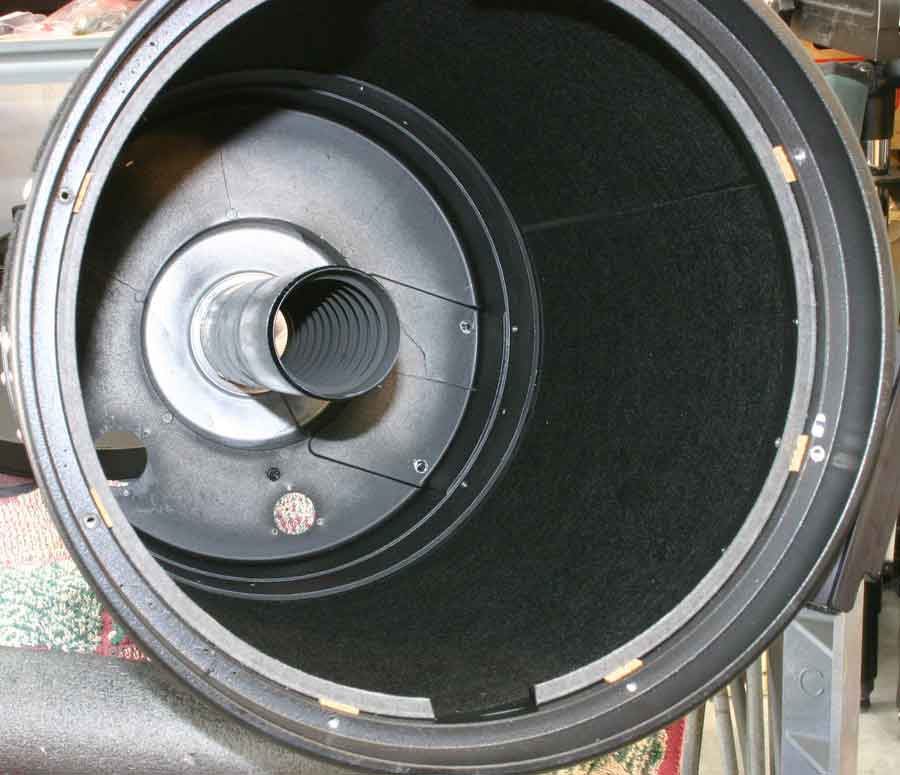
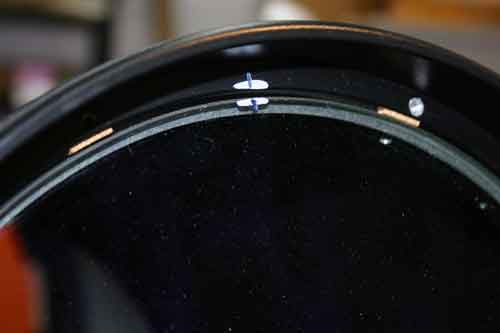
Taking on this "Flocking" project has allowed me to address the above issues and increase the performance of the LX200R to where it should have been before it was shipped to me. NOTE: All of the images below have been digitally stretched in order to show the flocking felt and other shadowed areas that would have otherwise shown up as "black holes" in the images. In the end, this project came out much cleaner than the pictures below may indicate. (Below) Naked OTA before and after views of flocking. What does not show in the "after" image is the flocking on the back side of the corrector plate holder/retaining ring that is seen holding the two semi-circle gaskets. I flocked both the vertical and flat portions of this inside area because the shiny black paint on this area directly reflects back down on the primary mirror.
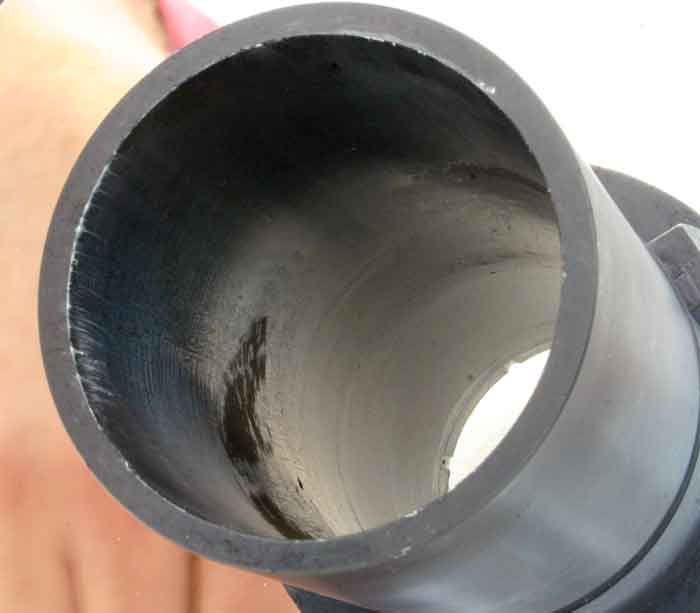
(Below) I found NO grease in the baffle slider! This is where the sloppy focus/image-shift came from. Notice on the right that I generously re-greased the slider when flocking the outside of the baffle slider near the primary mirror.
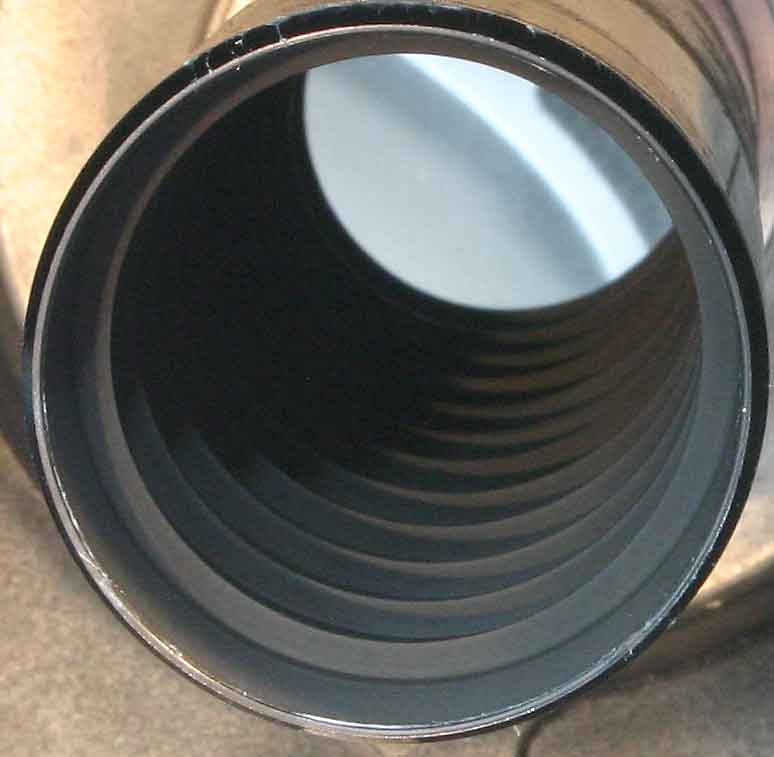
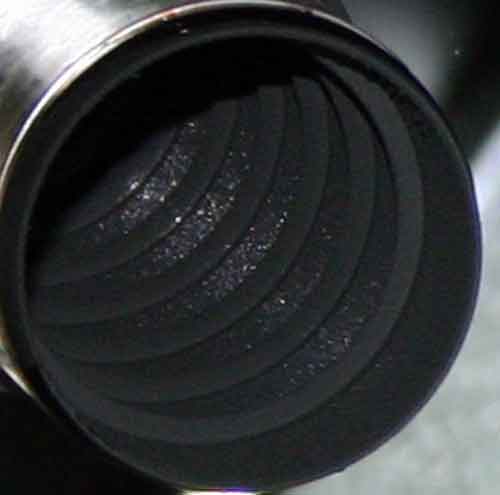
(Below) The inside of the LX200R baffle was actually flocked rather well with flat black paint but I sprayed more Ultra-Flat Black just to be sure. On the right you see the flocking inside of the secondary mirror housing and the "Ultra-Flat Black" paint on the outside. The paint line stops about 1/4" from the corrector plate because that is all the closer I could stretch a plastic kitchen bag over the conical housing without removing the housing from the corrector plate. Again, these images are overly stretched and don't truly show how black/dark this makes the inside of the OTA when assembled.
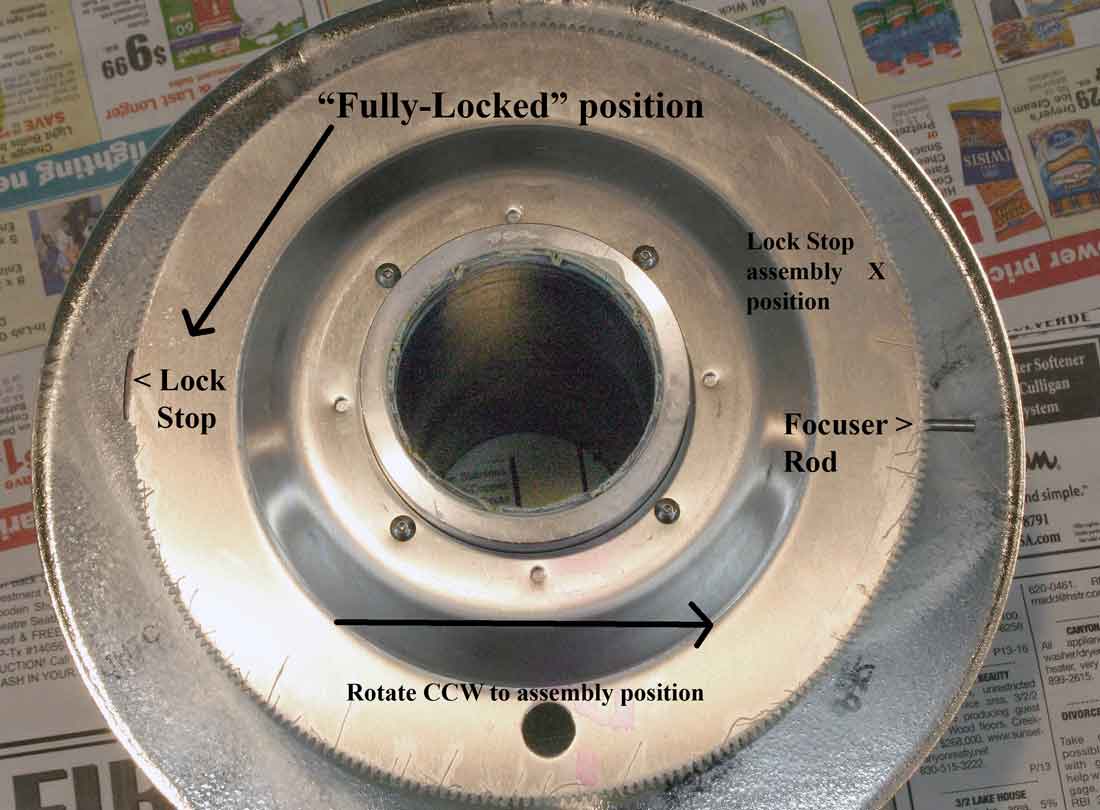
(Below) The LX200R locking mechanism. Notice that the lock is fully engaged when at 180 degrees from the focuser bar. When reassembling, rotate the gear lock-stop CCW about 210 degrees so that the lock-stop is above the focus rod about 2--4 inches (as pictured) BUT BELOW the lock hole on the back of the OTA. While placing the lock-stop below the lock-hole is important, exactly how much below the hole is not as critical. What is important is that the range of motion of the locking mechanism is within the last half turn (~180 degrees) of being fully tight/locked down. Turning the lock-knob CCW (to lock mirror) will result in the 8" locking gear turning CW until either the compression ring tension and/or the gear screws tight against the baffle tube and locks the mirror in place. The compression ring is a plastic so it does compress/deform to some degree. This was never meant to be able to "lock" the mirror against someone with a gorilla grip but it does take out the slop. On the right is the rubber/plastic compression ring that grips the baffle slider tube and prevents mirror flop. Both of these images were taken before I re-greased the slider and compression ring area.
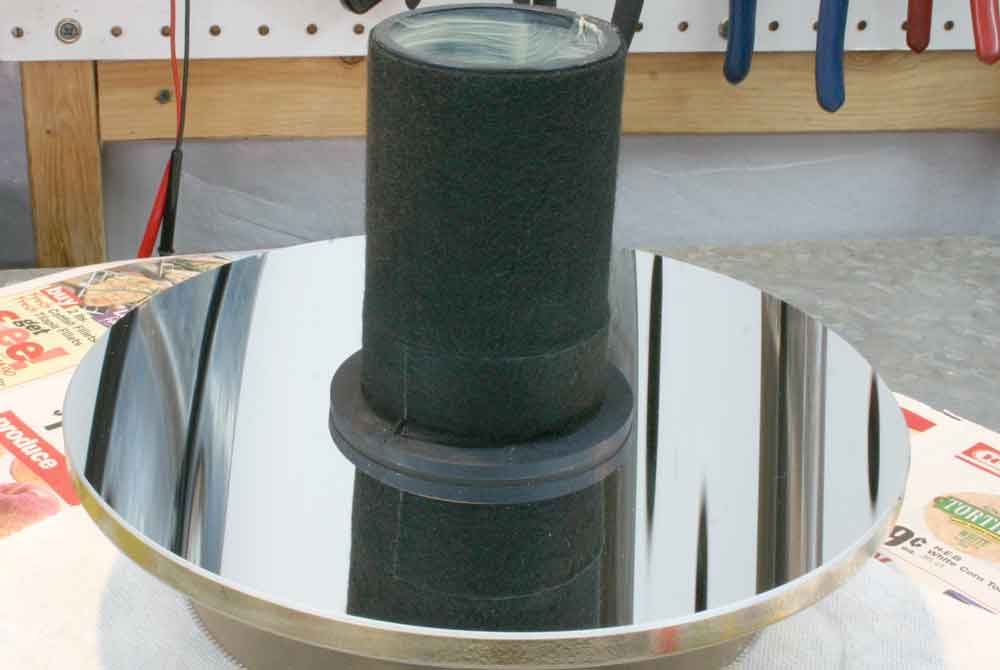
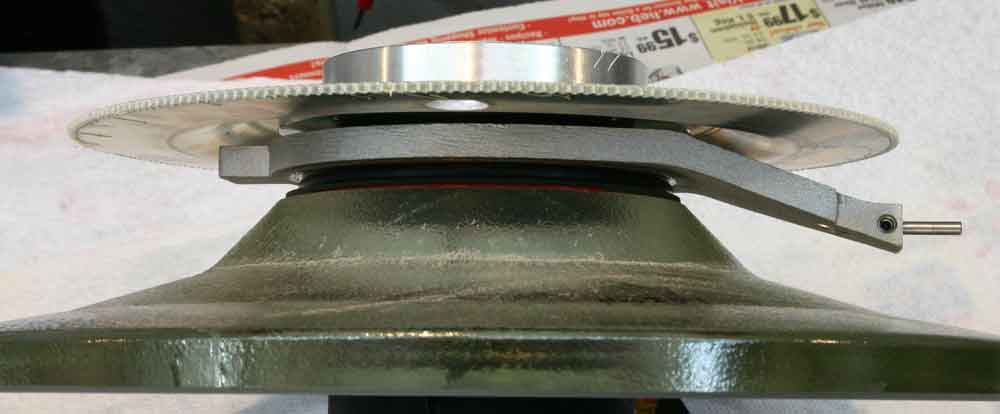
(Below) Here is a side view of the LX200R primary mirror showing the focus bar and locking gear in-place.
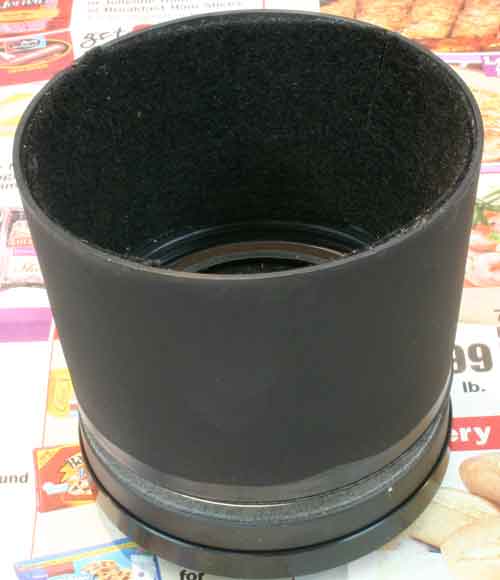
Flocking the 10in LX200 EMC Classic (Below) Pre and Post-Flocking Images of Inside of LX200 "Classic" OTA - I used Krylon Ultra-Flat Black for flocking the baffle tube and black felt for the OTA. I used a spray adhesive on the felt prior to placing in the OTA. I DID NOT spray adhesive inside the OTA.
|