Horizontal Heavens
Observatory
"...From A Galaxy Far, Far
Away"
Clear Sky Chart

This page was last updated on 10/08/14.
Horizontal Heavens
Observatory
"...From A Galaxy Far, Far
Away"
|
|
MI-250 Clutch Modifications *click images to enlargeOther MI-250 Modification Links
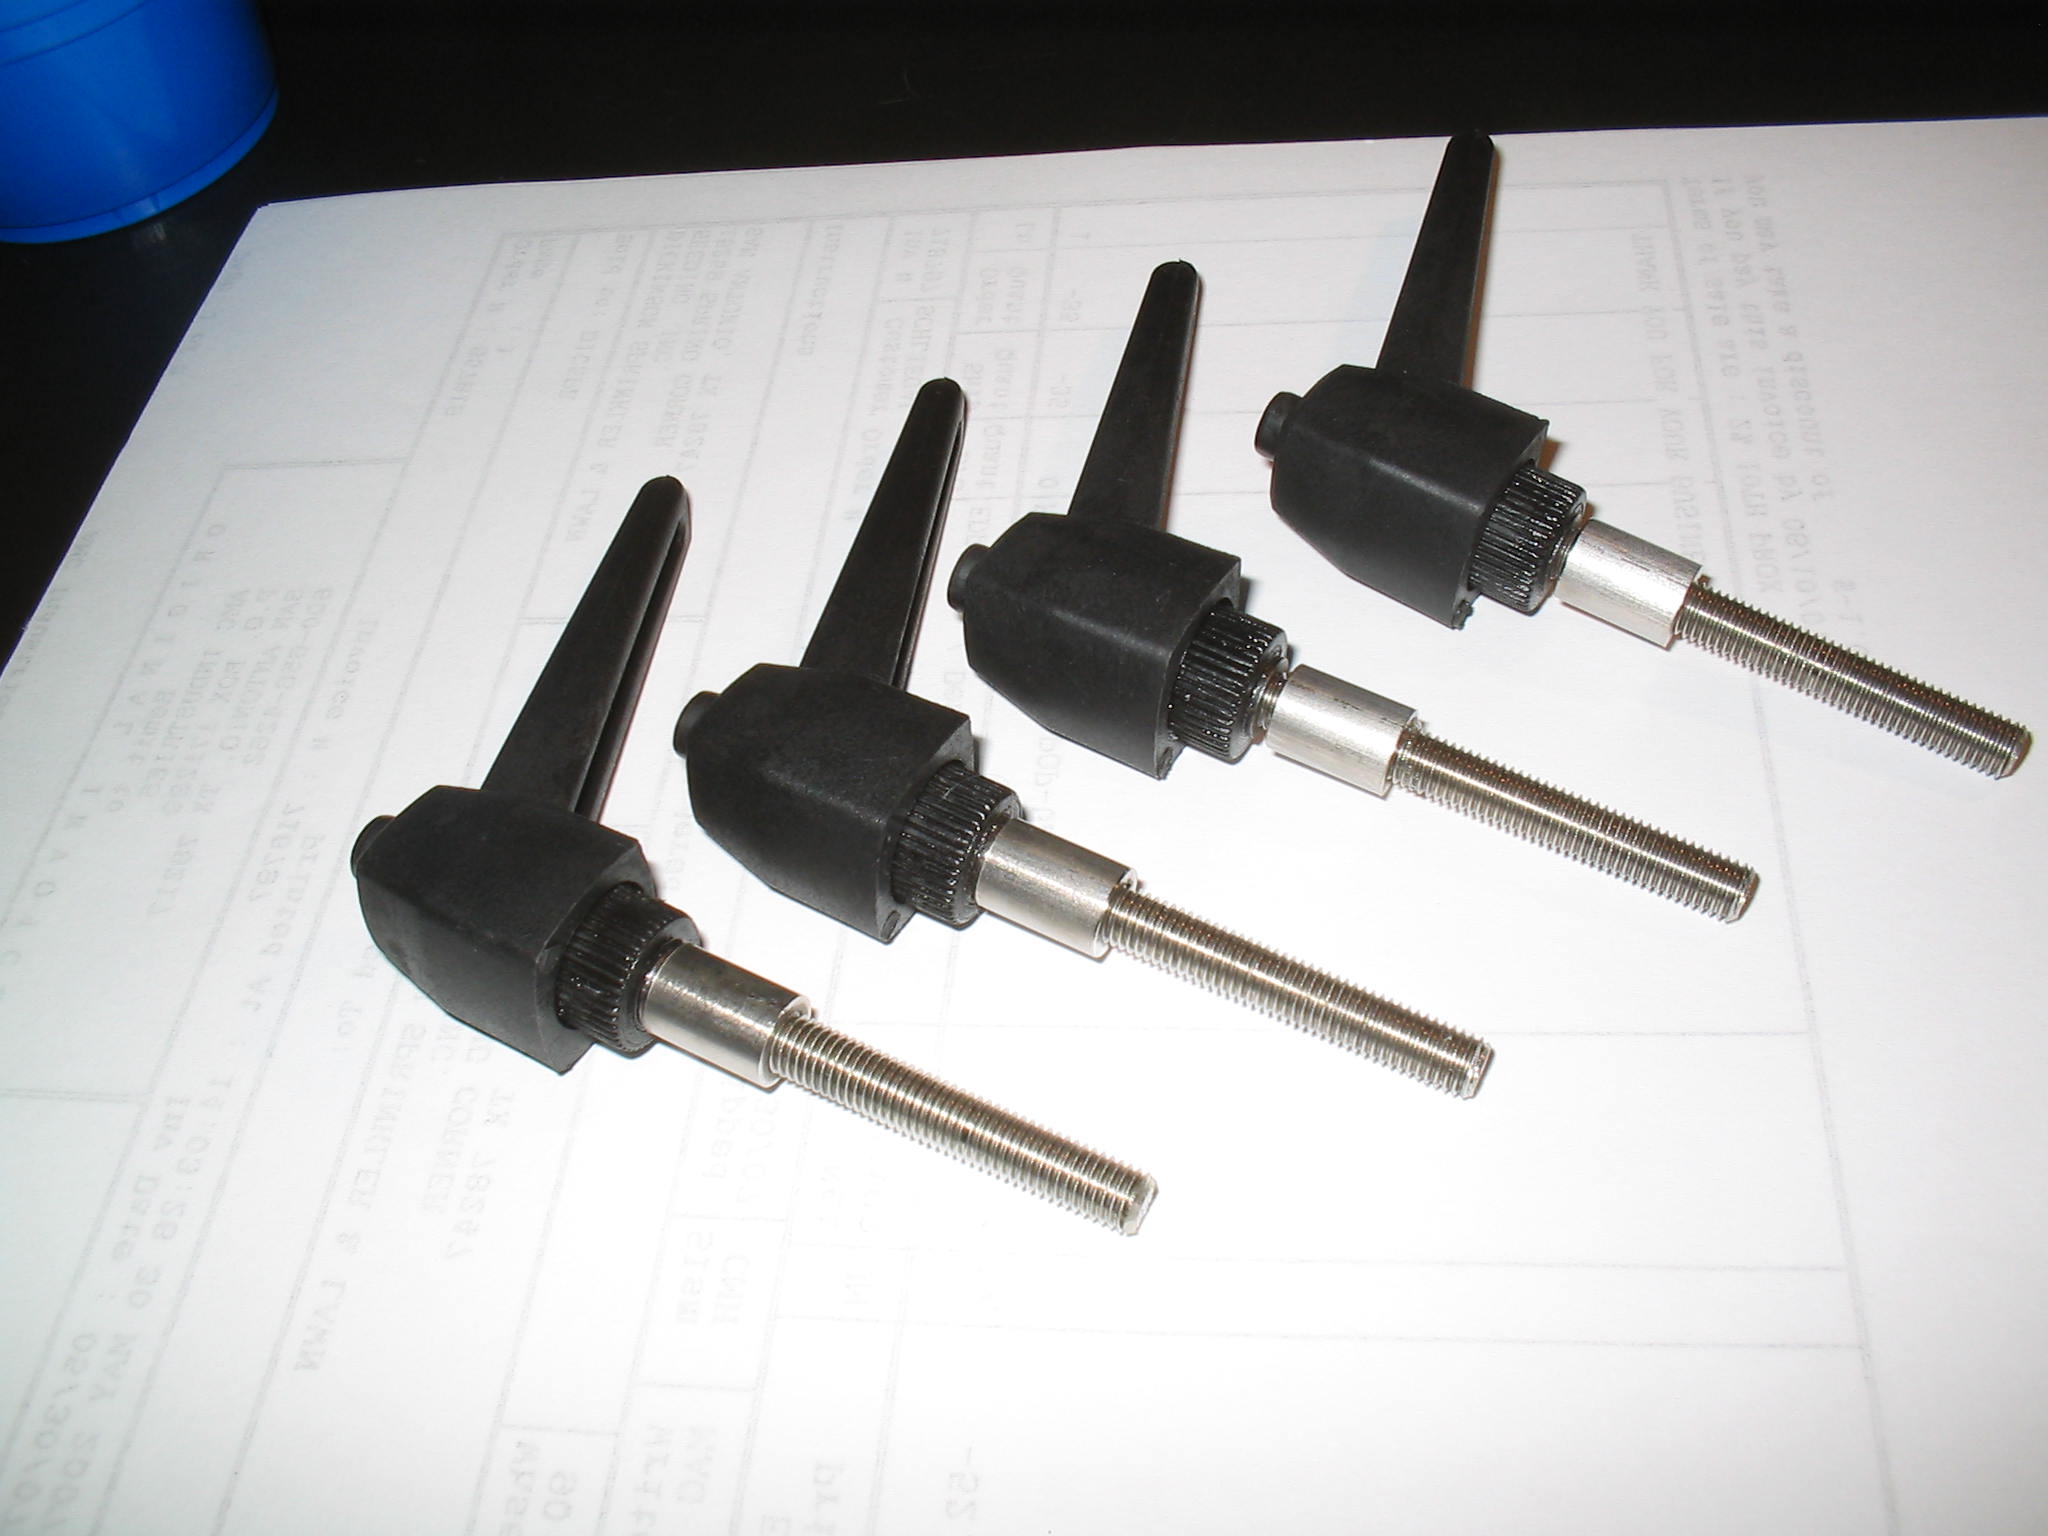
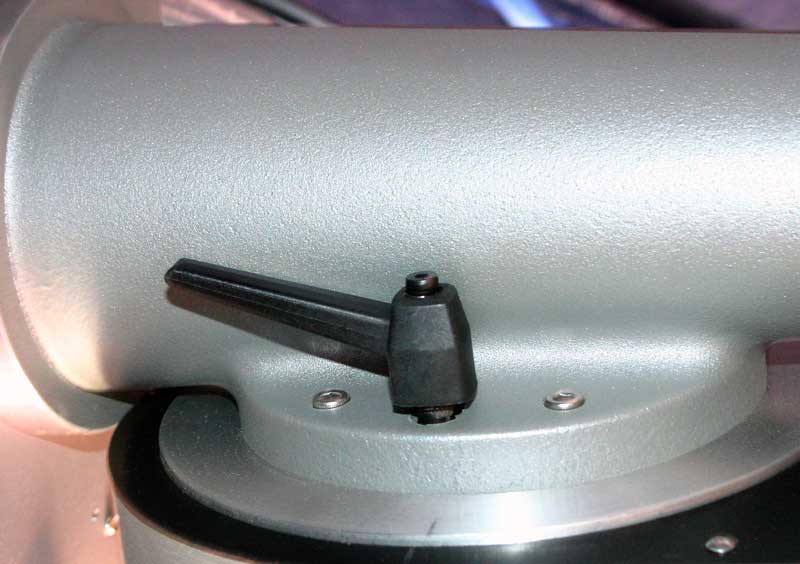
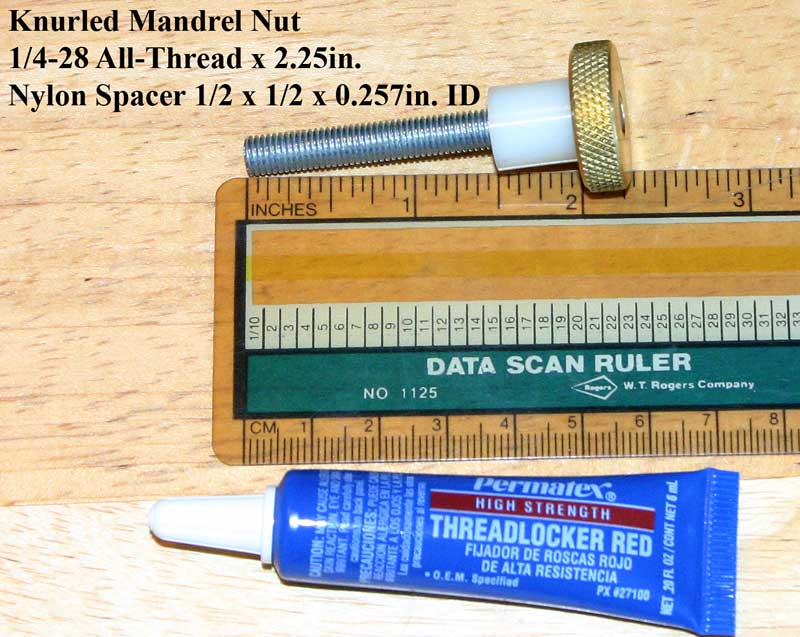
(Below) Tool-less RA & DEC Adjusting Clutch Levers and Thumbscrews - I found the adjustable levers at a WoodCraft Store but they only came in either 1/4-20 coarse thread (too small to drill out and re-tap) or 5/16" threads (got these because they allow for re-tapping) so my good friend Larry Dickinson tapped and drilled the 5/16" bolt heads on the lever to the required 1/4-28 fine thread pitch and added the all-thread. Spacers are required to miss the RA housing and should be 5/8" long but still leaving 1.5" of threaded bolt on the end.
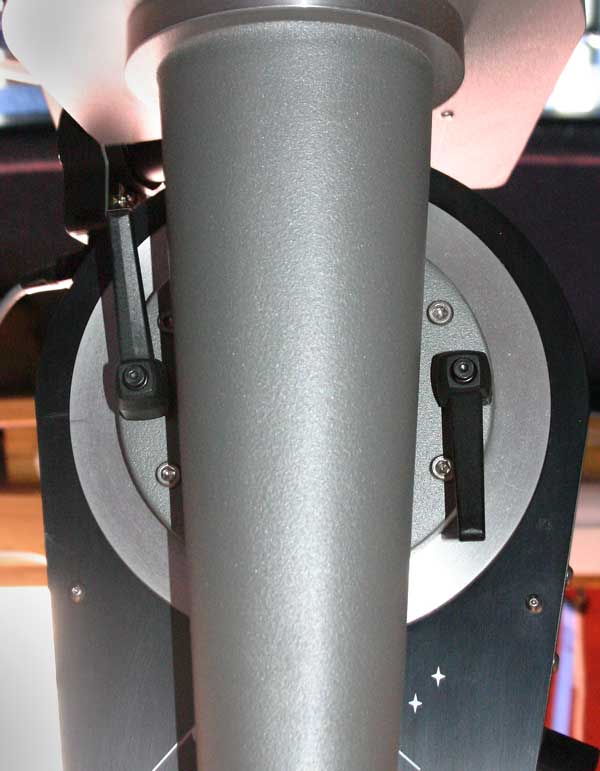
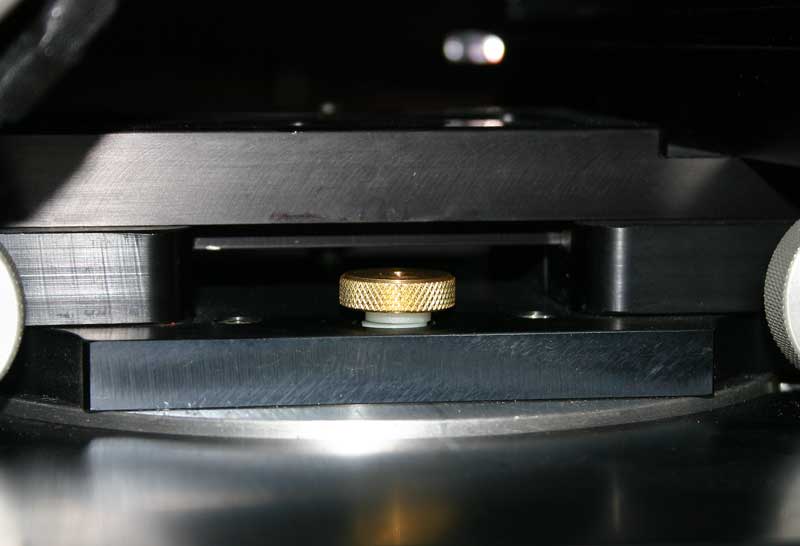
(Below) DEC Thumbscrews were required because the new "Lever Bolts" were too close to the side of the DEC's dovetail plate to work. The new thumbscrews were assembled in place AND THEN the knurled thumbscrew was added and Locktite'd to the all-thread. In other words, screw the all-thread in place, add the spacers, and then screw on the knurled nut (add Locktite to the nut before this last step). There is NOT enough room to clear the knurled nut if it is Locktite'd to the all-thread before screwing into the clutch plate. The dovetail gets in the way. I could have locktite'd the nut on the all-thread earlier, however, that would require dismounting all scopes and dovetails to install the "preassembled" DEC clutch thumbscrews. Also note, the original DEC clutch bolts already have a thin nylon washer (viewable in the right image below just under the knurled nut) that is still needed, along with the new spacer, to achieve the proper clearance for the new thumbscrew to operate correctly. WARNING NOTE: If you choose to do this make sure you loosen just ONE clutch bolt at a time. Let the Locktite set before snugging the first thumbscrew down and THEN remove the OTHER clutch bolt for replacement. You don't want your DEC swinging freely while waiting for things to cure. Do this at your own risk.
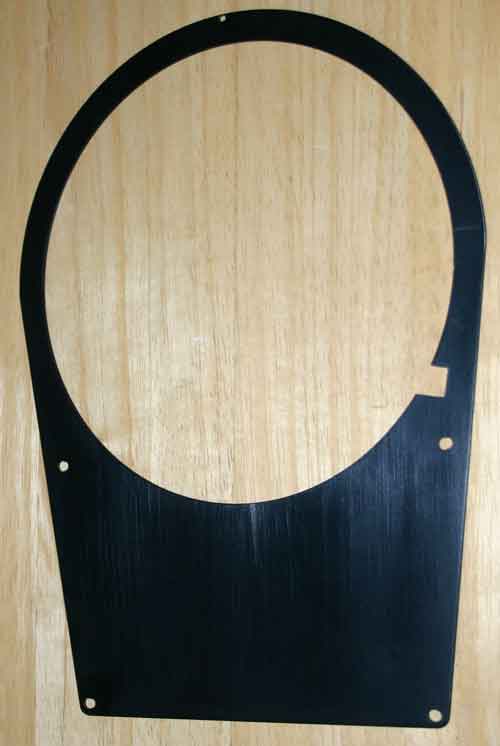
(below) DEC Cover With 1/4" Key Stock Notch - After struggling adjusting the DEC axis worm gear lashing with all scopes mounted, I decided to make things easier on myself by adding this notch that now allows me to use the 1/4" Key Stock to set the correct worm lashing starting point. Now I can leave all scopes in place and adjust under load without the fear of getting "too far" out of adjustment or proper orientation.
|